Documentation
Step-by-step guides for every major feature of CrewInput.
Getting Started
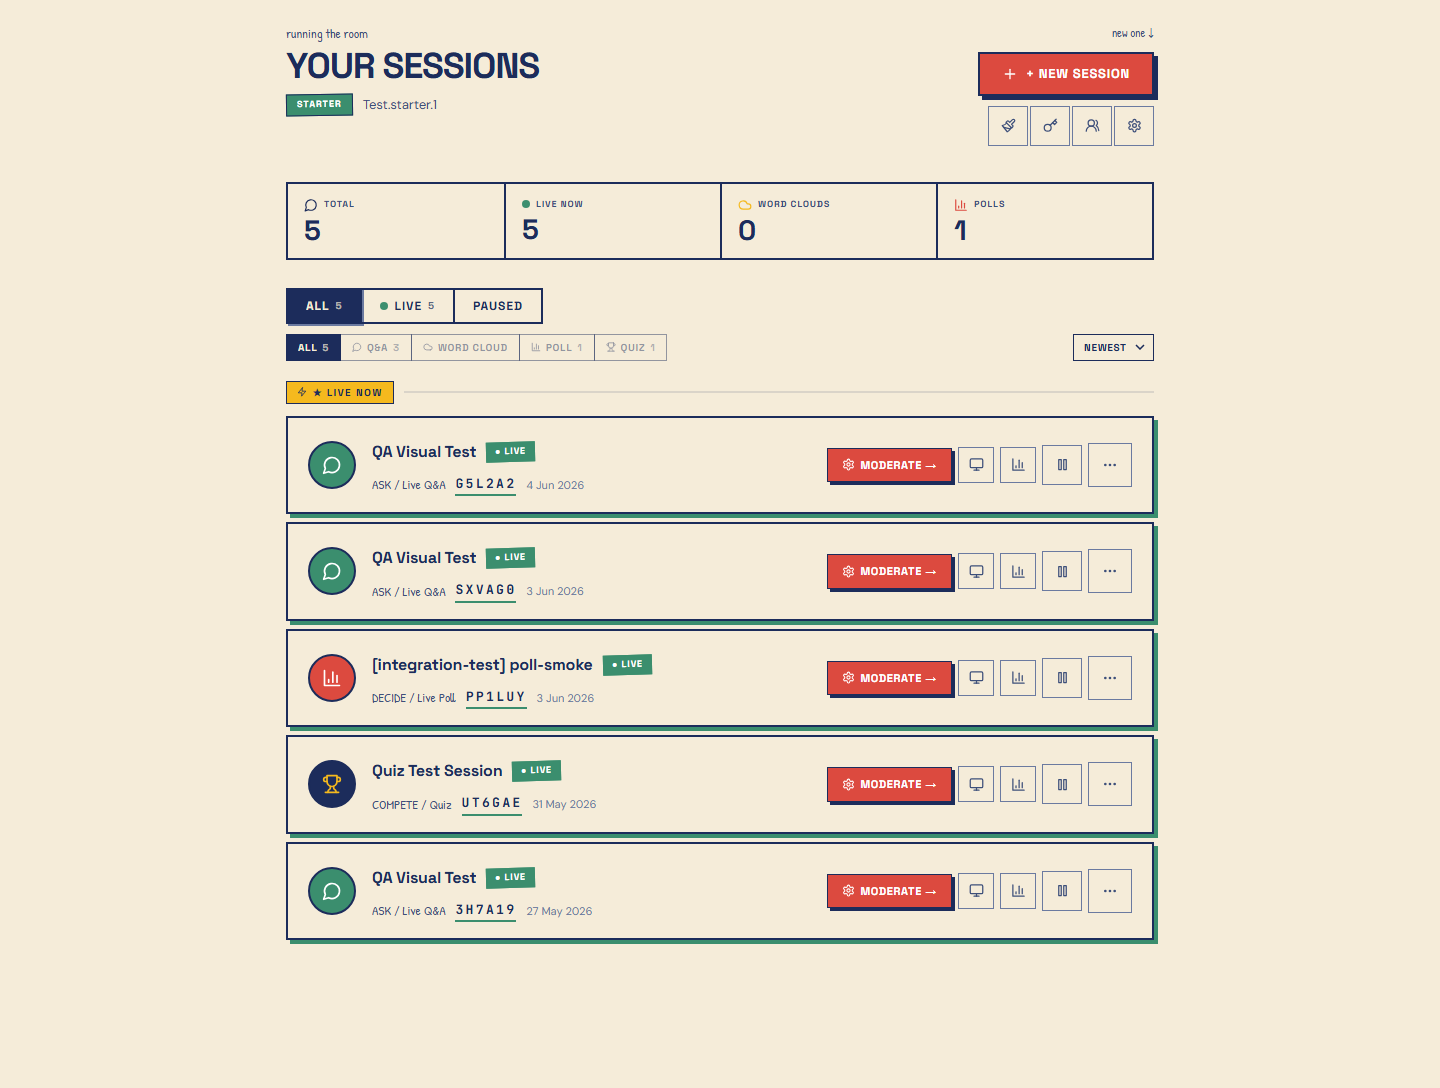
CrewInput lets you run live interactive sessions at events — audience Q&A, word clouds, polls, and live quizzes. Moderators manage sessions from a browser; participants join instantly via a code, no account needed.
- 1Sign up or log in at CrewInput.com.
- 2You land on your moderator dashboard showing all your sessions.
- 3Click "New Session" to create your first session.
- 4Share the 6-character code — participants can join immediately.
Creating Sessions
Four session types are available. You can create and archive as many sessions as your plan allows; the Free plan supports 1 active session at a time.
Live Q&A
Participants submit questions. You approve or reject before they go public. Questions can be upvoted.
Word Cloud
Participants submit words or phrases. Popular entries grow larger in a live cloud display.
Live Poll
Multiple polls in sequence — multiple choice, rating scale, NPS, ranking, or open text. Activate and close each at your own pace.
Live Quiz
Timed multiple-choice rounds with a live leaderboard. Speed-based scoring rewards fast, correct answers.
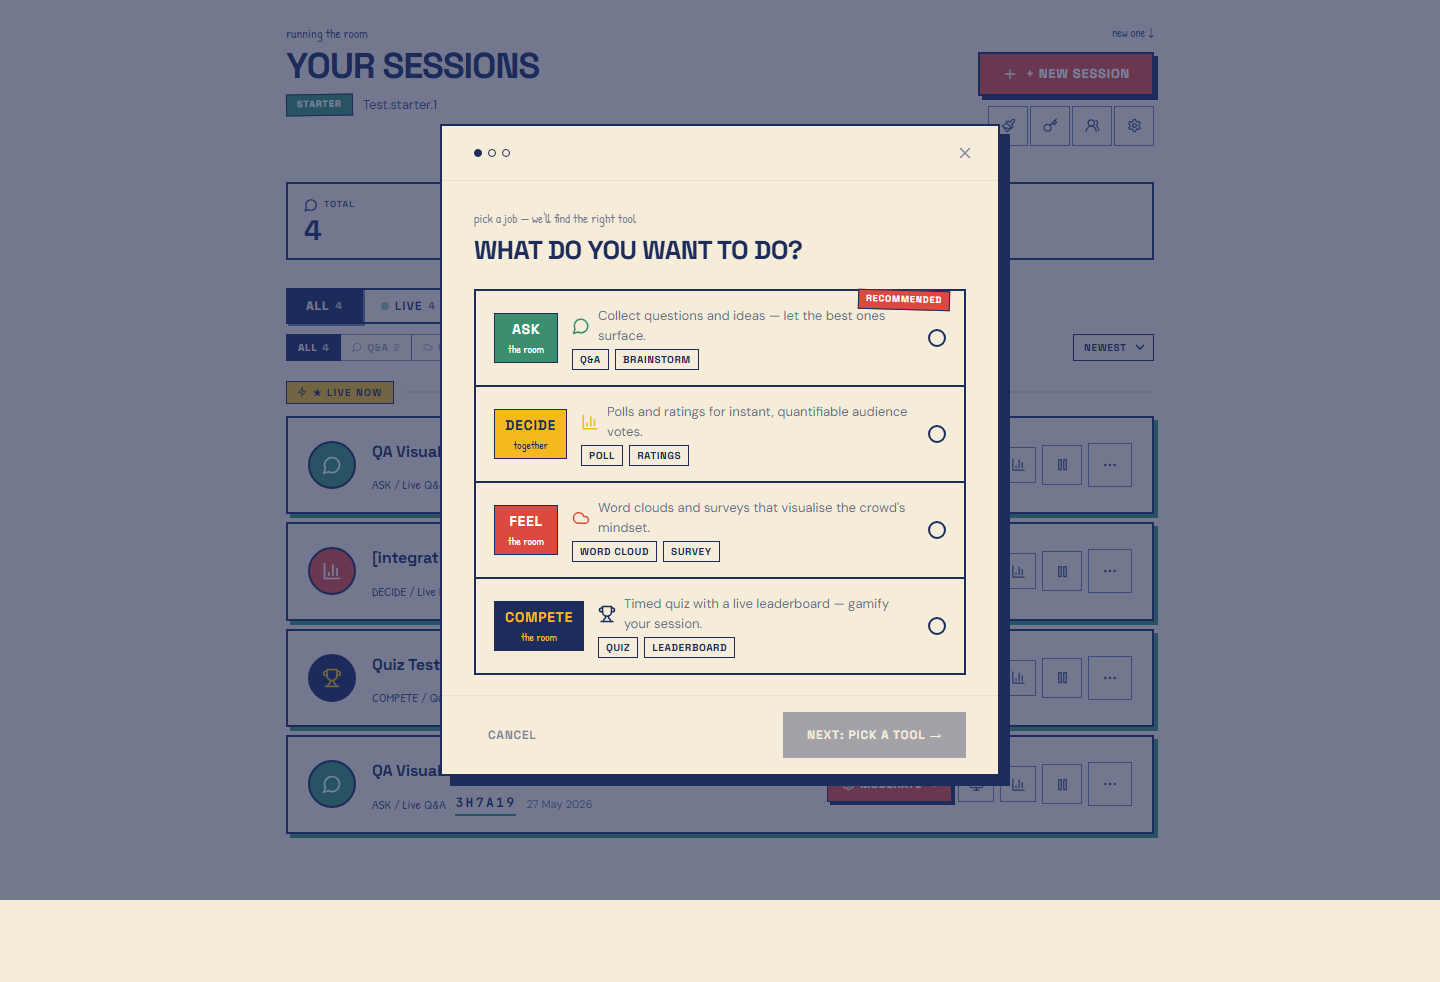
- 1Click "+ New Session" on your dashboard.
- 2Choose your goal: ASK (questions & ideas), DECIDE (polls & ratings), FEEL (word cloud), or COMPETE (quiz).
- 3Pick the specific tool for that goal.
- 4Name your session and click "Publish & Get Code →" — you're live immediately.
Sharing with Participants
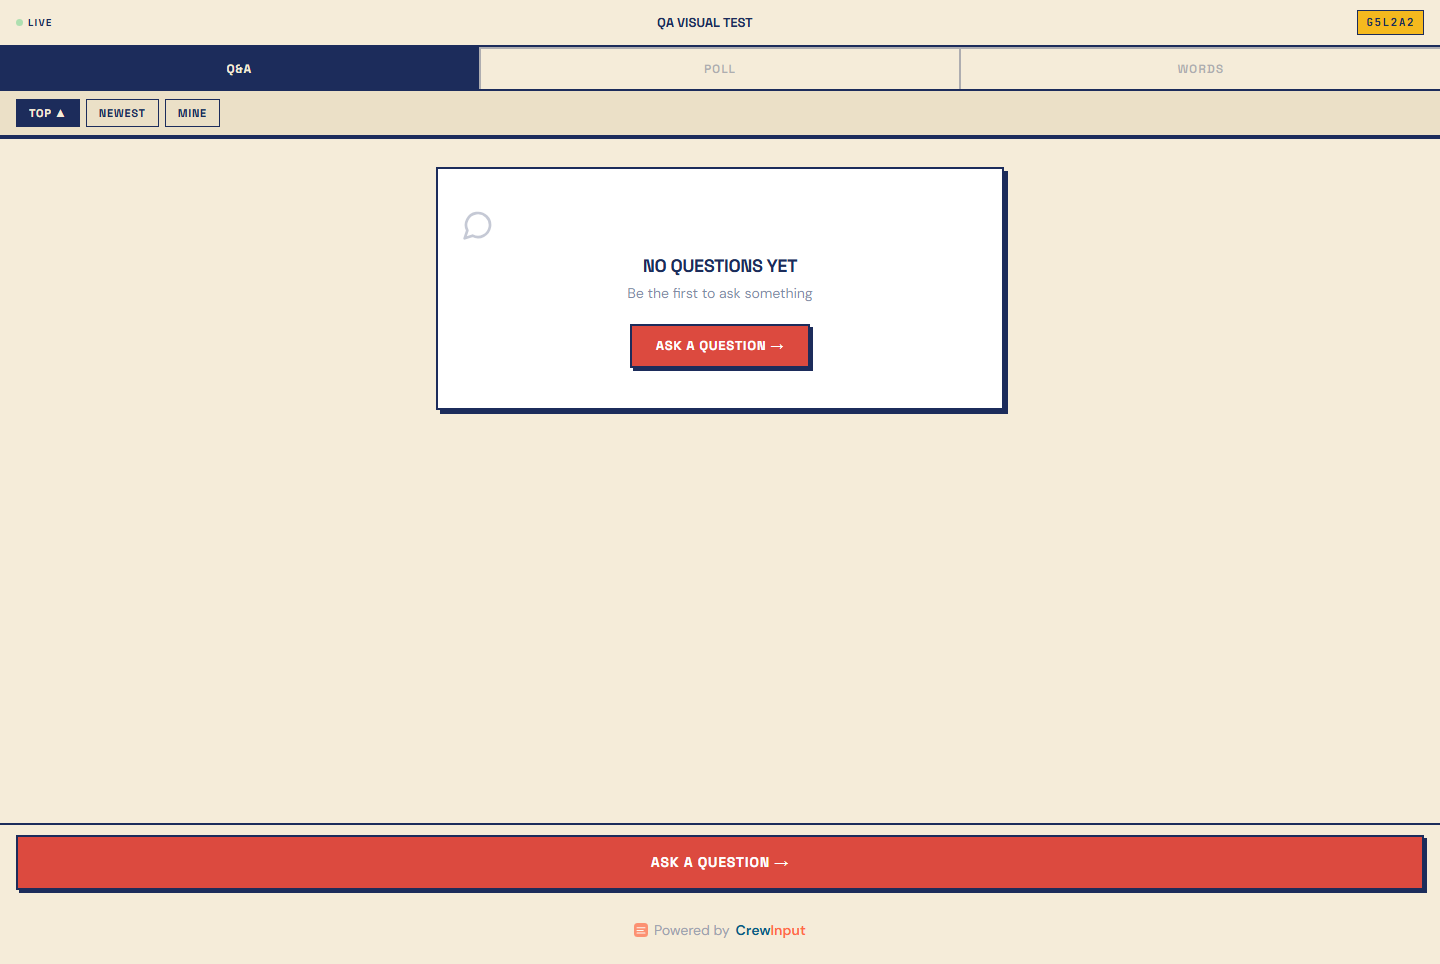
Participants never need an account. The only thing they need is the session code — share it however is convenient.
- 1Open your session. The 6-character code is shown prominently at the top.
- 2Tell participants to go to CrewInput.com and enter the code.
- 3Alternatively, click the QR icon to open a fullscreen QR code page — project it or display it on screen.
- 4Participants are live as soon as they submit the code.
Live Q&A Moderation
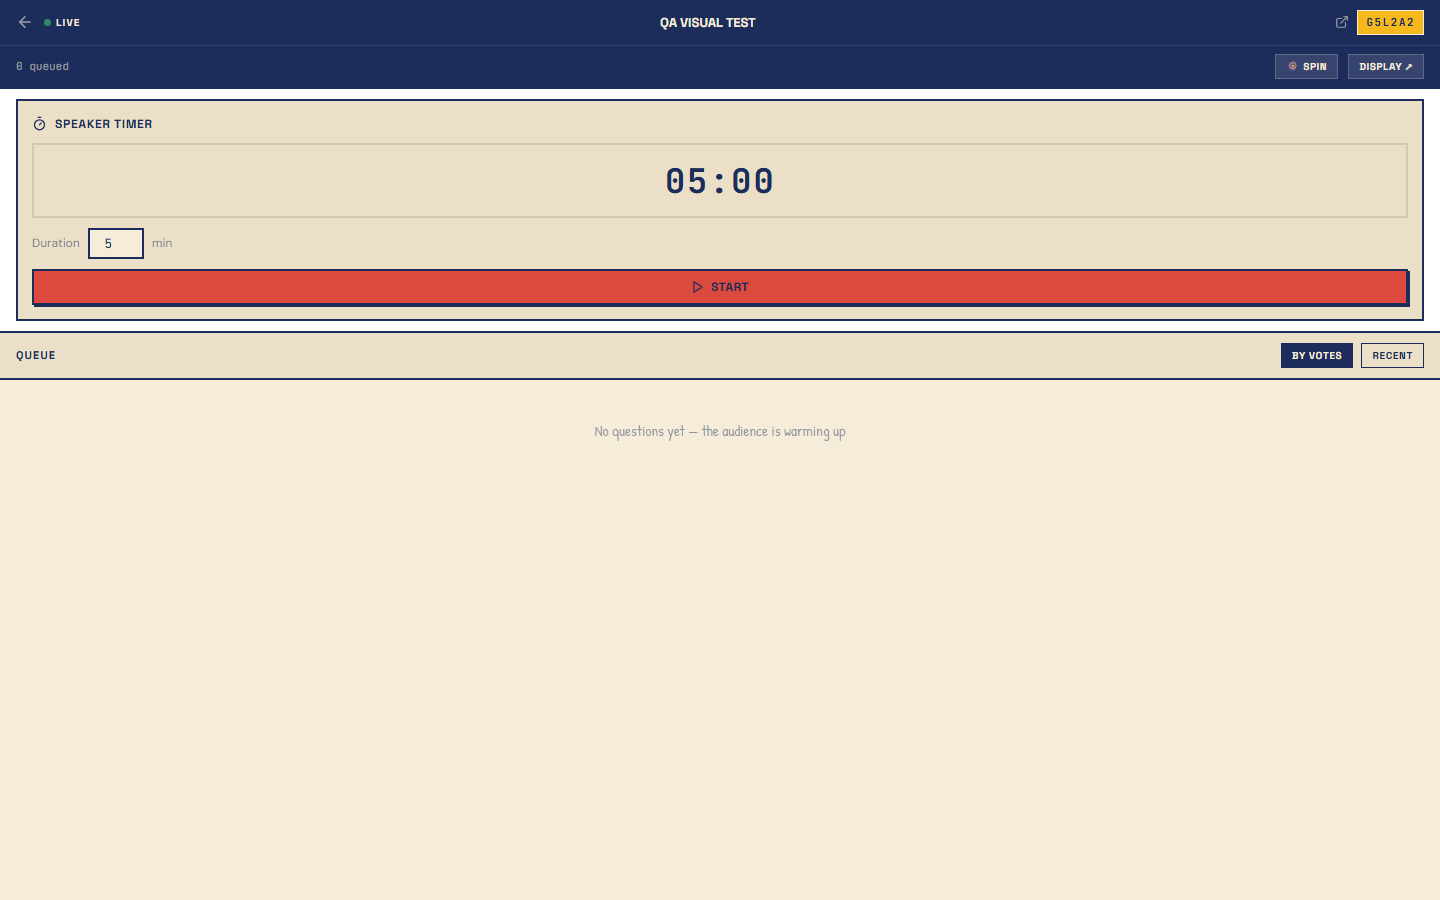
All incoming questions are held in a moderation queue — nothing goes public until you approve it. Use the Live Moderation view for a distraction-free panel during the event.
- 1Open your Q&A session.
- 2Incoming questions appear in the "Pending" queue.
- 3Click the green tick to approve a question (it becomes visible to all participants).
- 4Click the X to reject a question (removed silently, participant is not notified).
- 5Click "Moderate →" on the live session card for the full-screen moderation panel.
- 6Approved questions can be hidden at any time from the published list.
Running a Poll
Polls support five question formats: multiple choice, rating scale, NPS (0–10), ranking, and open text. You control exactly when each poll opens and closes.
- 1Create a "Live Poll" session (DECIDE goal) or open an existing one.
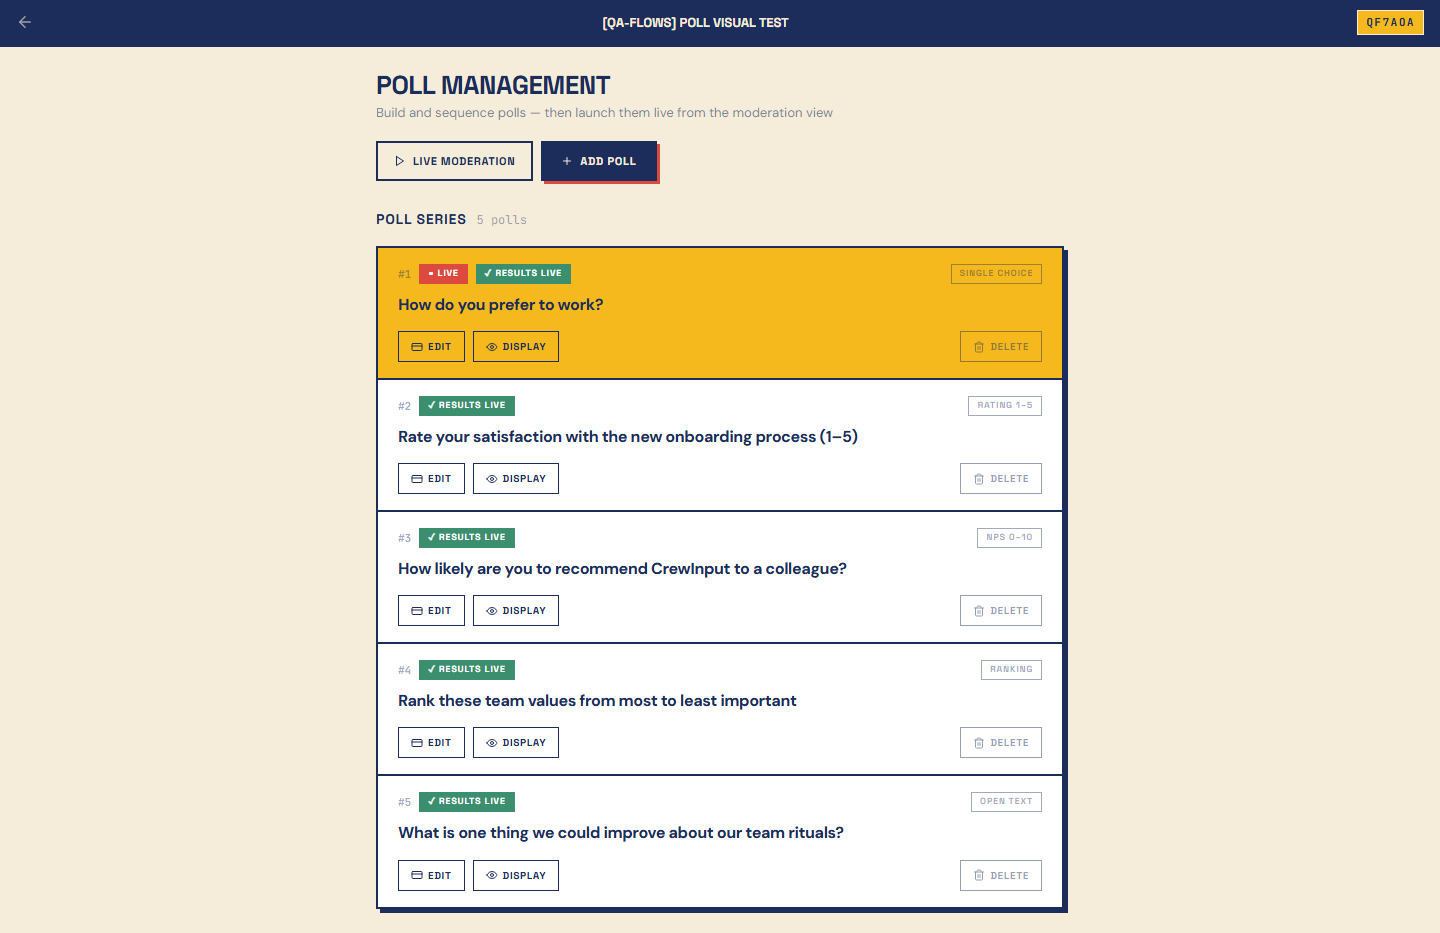
- 2Click "Manage Polls" then "+ Add Poll" — choose a poll type and enter your question.
- 3Click "Live Moderation" to open the moderation panel, then "Activate" a poll.
- 4Participants see the poll immediately; results update live as votes arrive.
- 5Click "Close" when done — results stay visible. Run multiple polls in sequence.
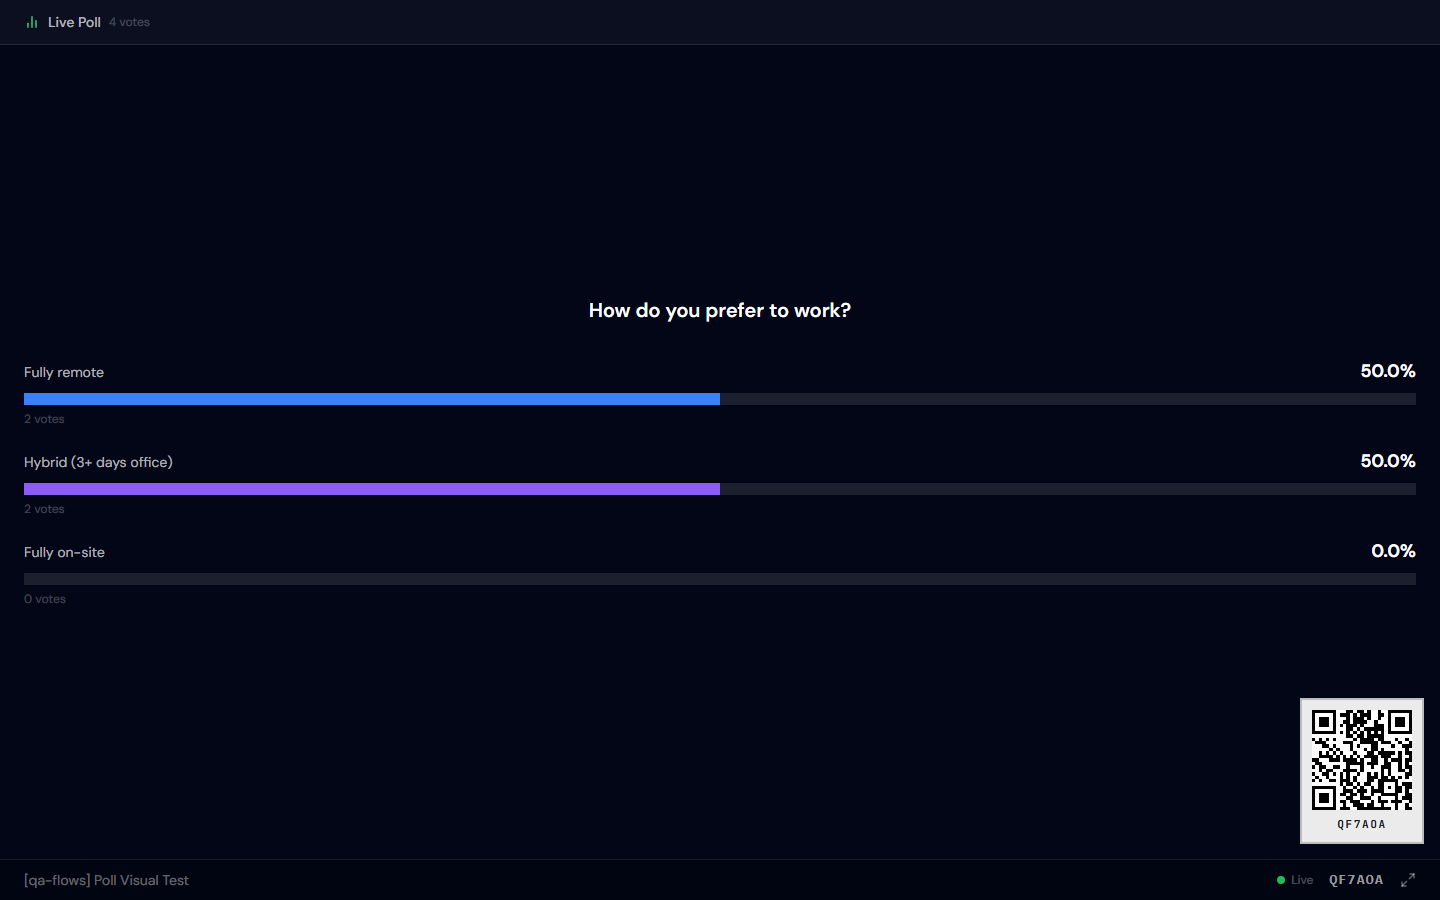
- 6Use the "Display" button to project live results fullscreen.
Word Clouds
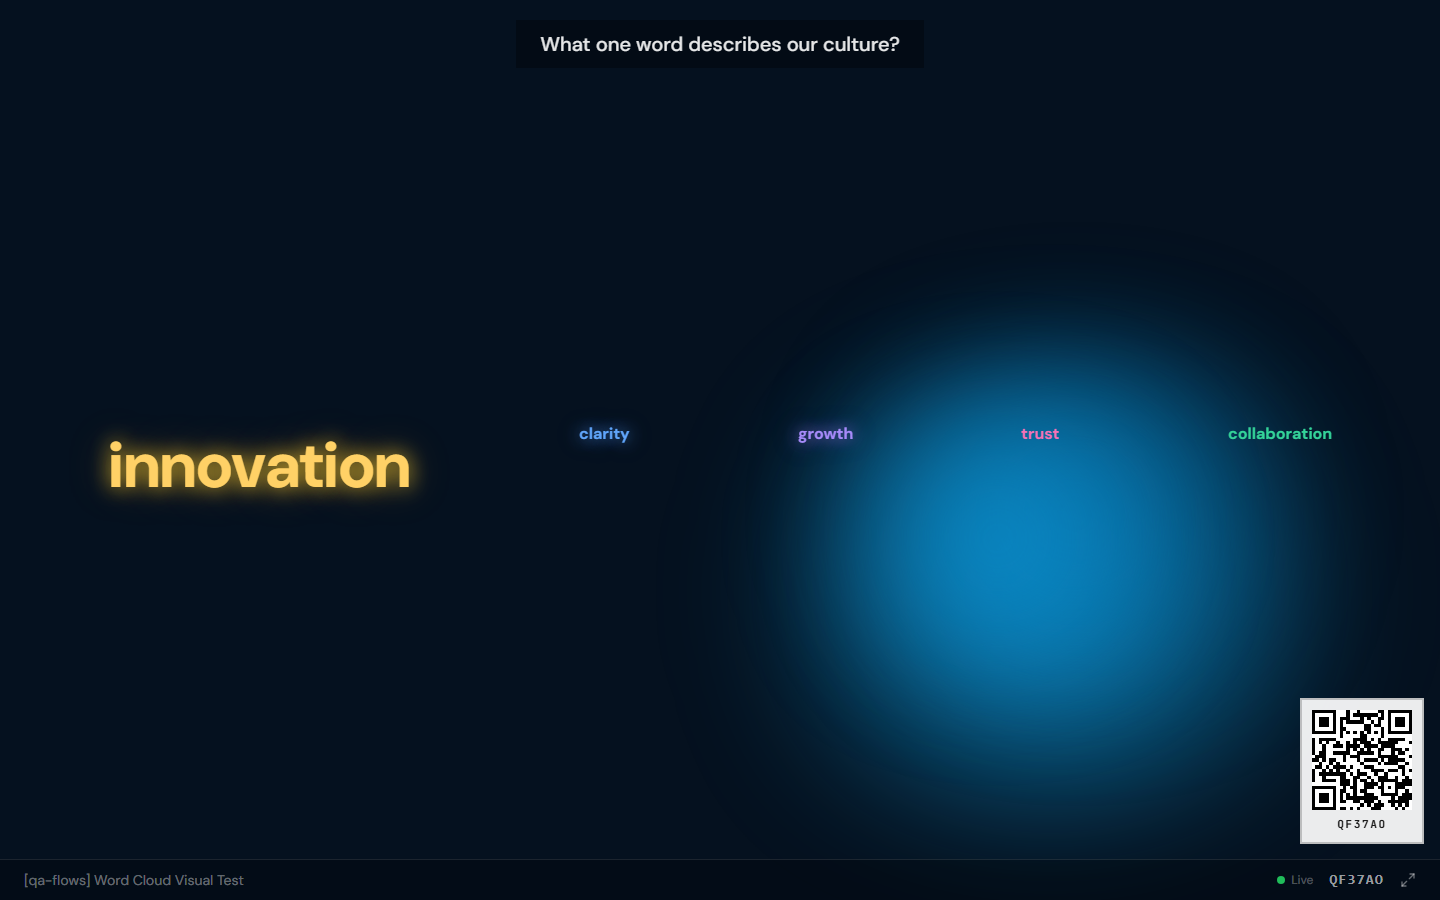
Participants submit words or short phrases. The most popular entries appear largest in a live animated cloud — ideal for icebreakers, brainstorming, and sentiment checks.
- 1Create a "Word Cloud" session.
- 2Share the code — participants start submitting words immediately.
- 3The cloud updates live as submissions arrive.
- 4Open the Display view (see Display Mode below) to project the cloud fullscreen.
- 5Reset the cloud at any time from the session controls.
Live Quiz
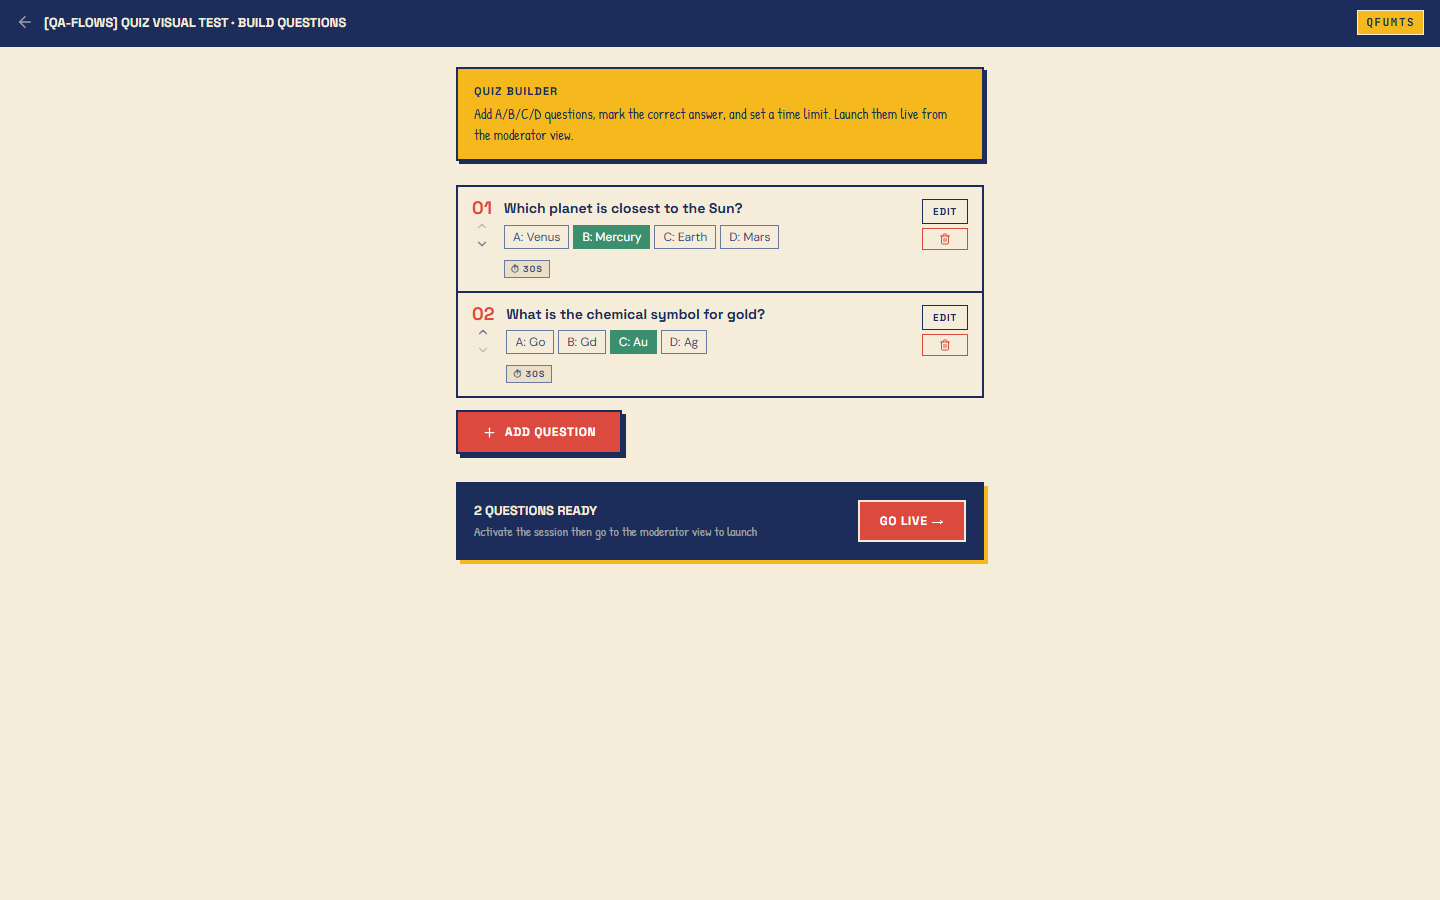
Timed multiple-choice rounds with a live leaderboard. Participants compete in real time — speed and accuracy both count towards the score.
- 1Create a "Live Quiz" session (COMPETE goal).
- 2Click "Build Questions" to add A/B/C/D questions, mark the correct answer, and set a time limit per question.
- 3Activate the session, then click "Go Live →" to open the moderator view.
- 4Click "Start Quiz" — participants join and wait for the first question.
- 5Advance through questions; each shows a countdown timer for participants.
- 6Click "Reveal Answers" after each question to show the correct answer and updated leaderboard.
- 7End the quiz to display the final standings.
Engagement Extras
Three extras sit alongside the main session tools. You drive them from the Live Q&A moderation view, and they appear on the display view your audience is watching.
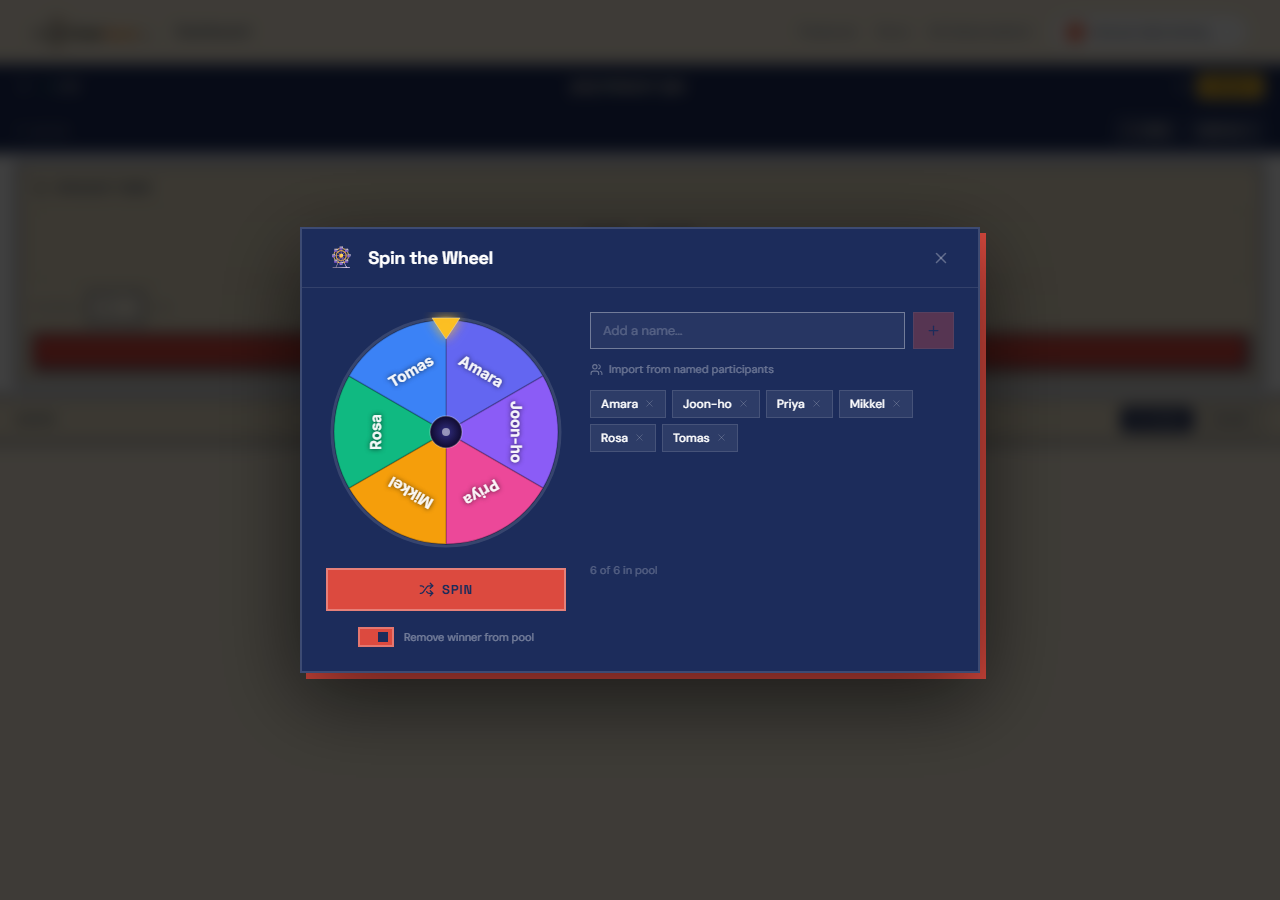
- 1Spin Wheel — open your Q&A session, click "Live Moderation", then the wheel button. Enter the names or options to choose between and spin; the wheel animates on the display view so the room sees the result at the same time you do.
- 2Speaker Timer — in the same moderation view, set a countdown for the current speaker. It shows large on the display view and keeps sessions to time.
- 3Background music — the display views for Q&A, word clouds, and polls carry a small music player, useful while the room is filling up or waiting on submissions.
The Spin Wheel and the music player are available on every plan. The Speaker Timer requires Starter or Pro.

Display Mode
Display mode is a chromeless, projection-optimised view of your session — no navigation, large text, designed to look great on a conference screen.
- 1On the session card, click the monitor icon to open the display view in a new tab.
- 2Open that URL on your projector or second screen — no interaction needed on that device.
- 3Q&A uses /session/[code]/display; polls use /session/[code]/live-poll; word clouds use /session/[code]/word-cloud; quizzes use /session/[code]/quiz.
- 4All display views are chromeless and optimised for large screens — the view updates live.
Session Analytics
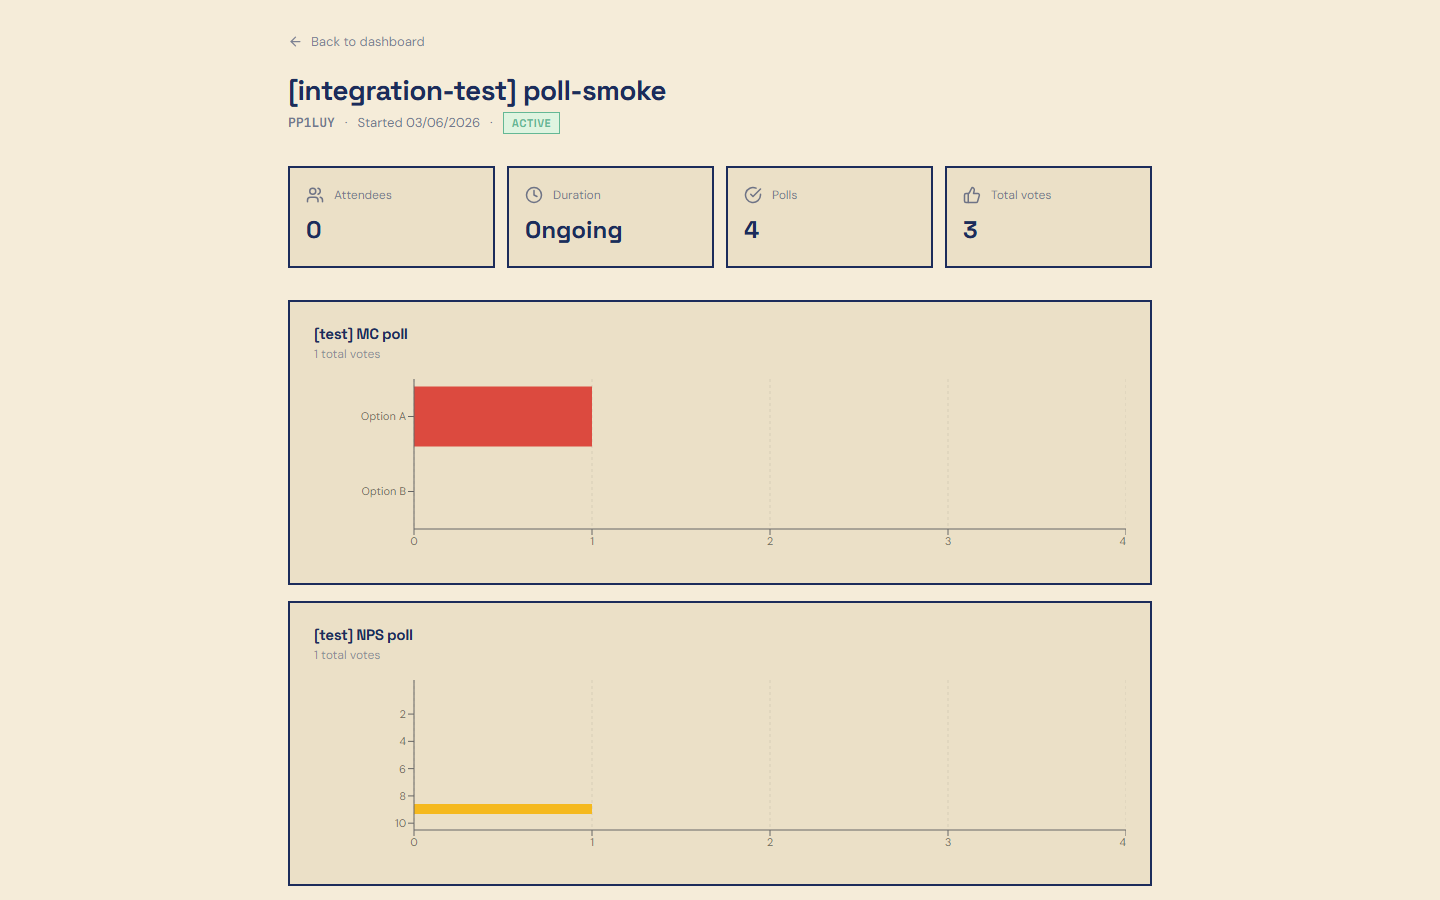
Analytics depth depends on your plan. All plans include basic stats; Starter and Pro unlock charts and export.
- 1On the session card, click the bar chart icon to open analytics.
- 2Browse stats, charts, and top questions.
- 3Click "Export CSV" to download all data (Starter+ plans).
Branding & Customisation Starter+
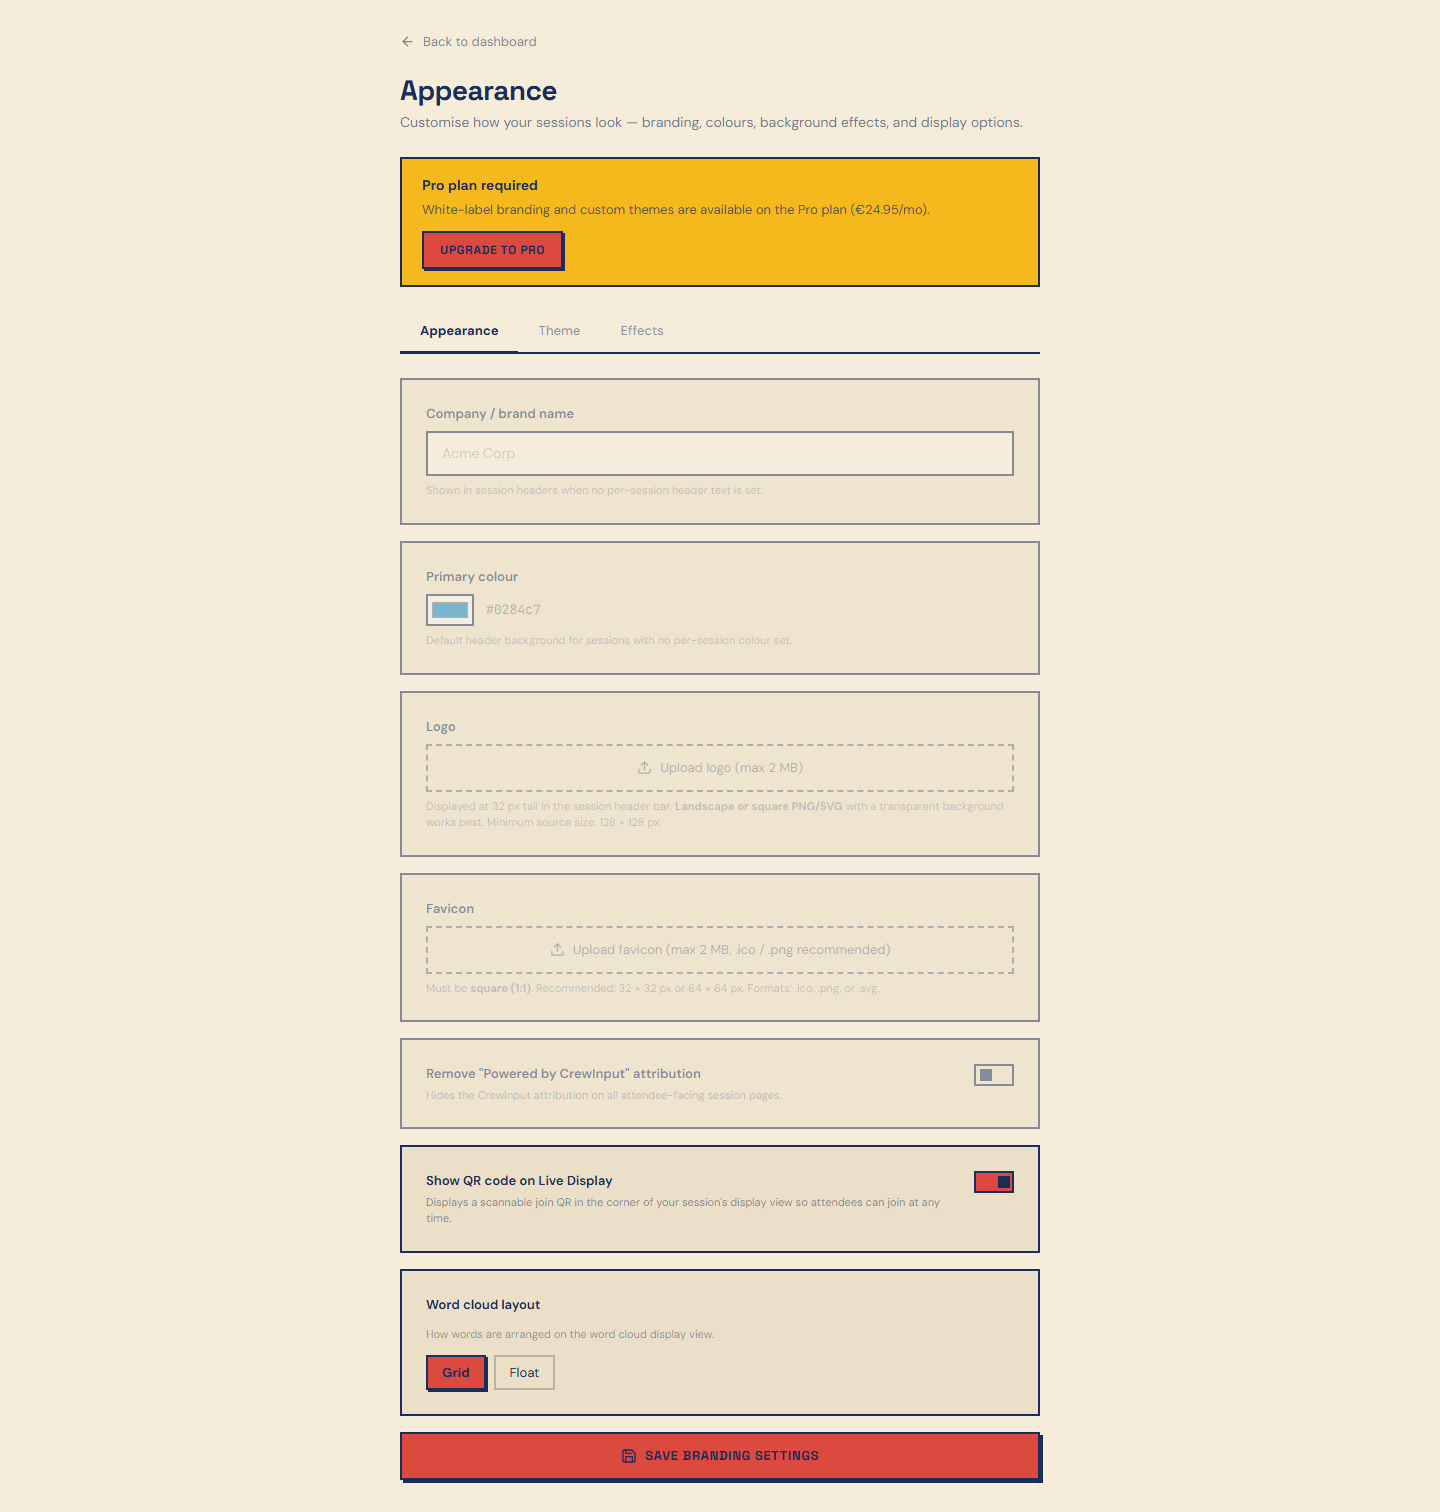
Starter and Pro plans let you customise the participant-facing views with your own logo, colours, and typography. Pro adds full white-label support.
- 1From your dashboard, click the paintbrush icon in the header, or go to Settings → Appearance.
- 2Set your company name, primary colour, and upload a logo and favicon.
- 3Toggle "Remove Powered by CrewInput attribution" to white-label attendee-facing pages.
- 4Save — branding applies immediately to all attendee-facing session views.
Custom Domain Pro+
Pro plans can serve sessions from your own domain, so attendees never see a CrewInput URL. Combined with white-label branding, the experience is entirely yours.
- 1Go to Settings → Custom Domain.
- 2Enter the subdomain you want to use, for example events.acme.com, and click Add.
- 3At your DNS provider, add a CNAME record for that subdomain pointing at crewinput.netlify.app.
- 4Once DNS has propagated — which can take up to 24 hours — click Verify. An SSL certificate is issued automatically.
Team & Co-presenters Pro+
Bring colleagues into your workspace so more than one person can build and moderate sessions — useful when a producer sets up the session and a host runs it on the day.
- 1Go to Settings → Team.
- 2Enter a colleague's email address and send the invitation.
- 3They receive an invite they can accept or decline from their own Team page; accepting adds them to your workspace.
- 4To hand one specific session to someone instead of your whole workspace, use the co-presenter button on that session's card.
- 5Remove a member at any time from the same page — they immediately lose access to the workspace.
API Access Pro+
API keys let you pull session data into your own tools — a conference CMS, an internal dashboard, or a post-event report.
- 1Go to Settings → API Keys.
- 2Give the key a name that says where it will be used, for example "Conference dashboard", and click Create.
- 3Copy the key immediately — it is shown once and cannot be retrieved afterwards. Only the crwinput_live_… prefix is stored so you can tell keys apart later.
- 4Store it as a secret in whatever integration consumes it; never commit it to a repository.
- 5Revoke a key from the same page when it is no longer needed — anything using it stops working straight away.
Simulation / Test Mode Pro+
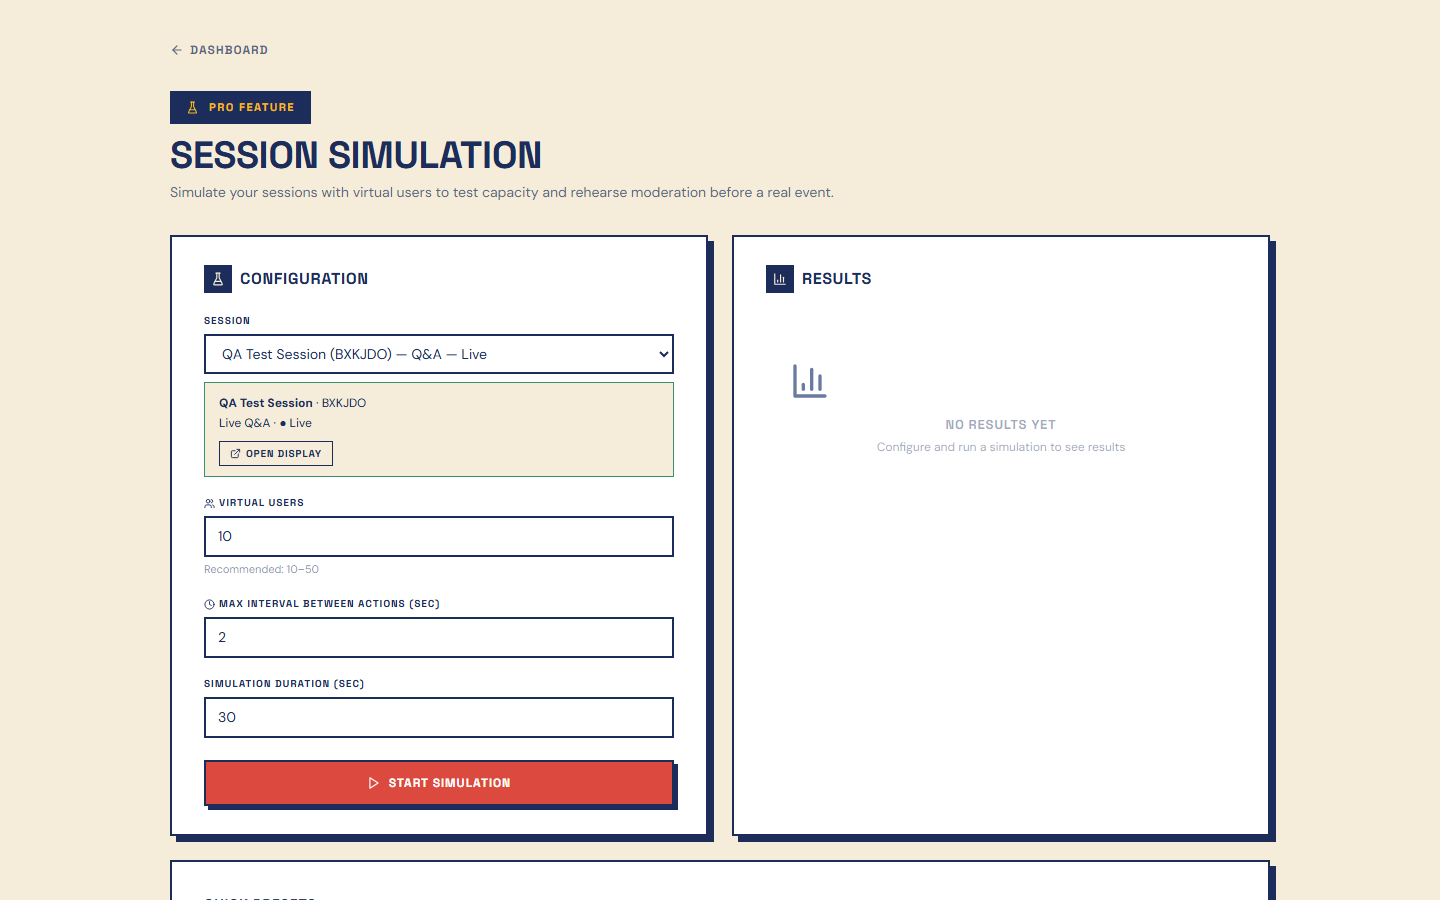
Test Mode (Pro only) lets you simulate a live session with virtual attendees. Use it to verify your setup, test capacity, and rehearse moderation before a real event.
- 1From your dashboard, click the flask icon in the header (visible to Pro users only).
- 2Select the session you want to simulate.
- 3Configure the number of virtual attendees and submission rate.
- 4Start the simulation — virtual participants submit questions and votes at the configured rate.
- 5Practice approving, rejecting, and managing questions exactly as you would live.
- 6Stop the simulation at any time; data from simulations is kept separate from real session data.
Plans & Billing
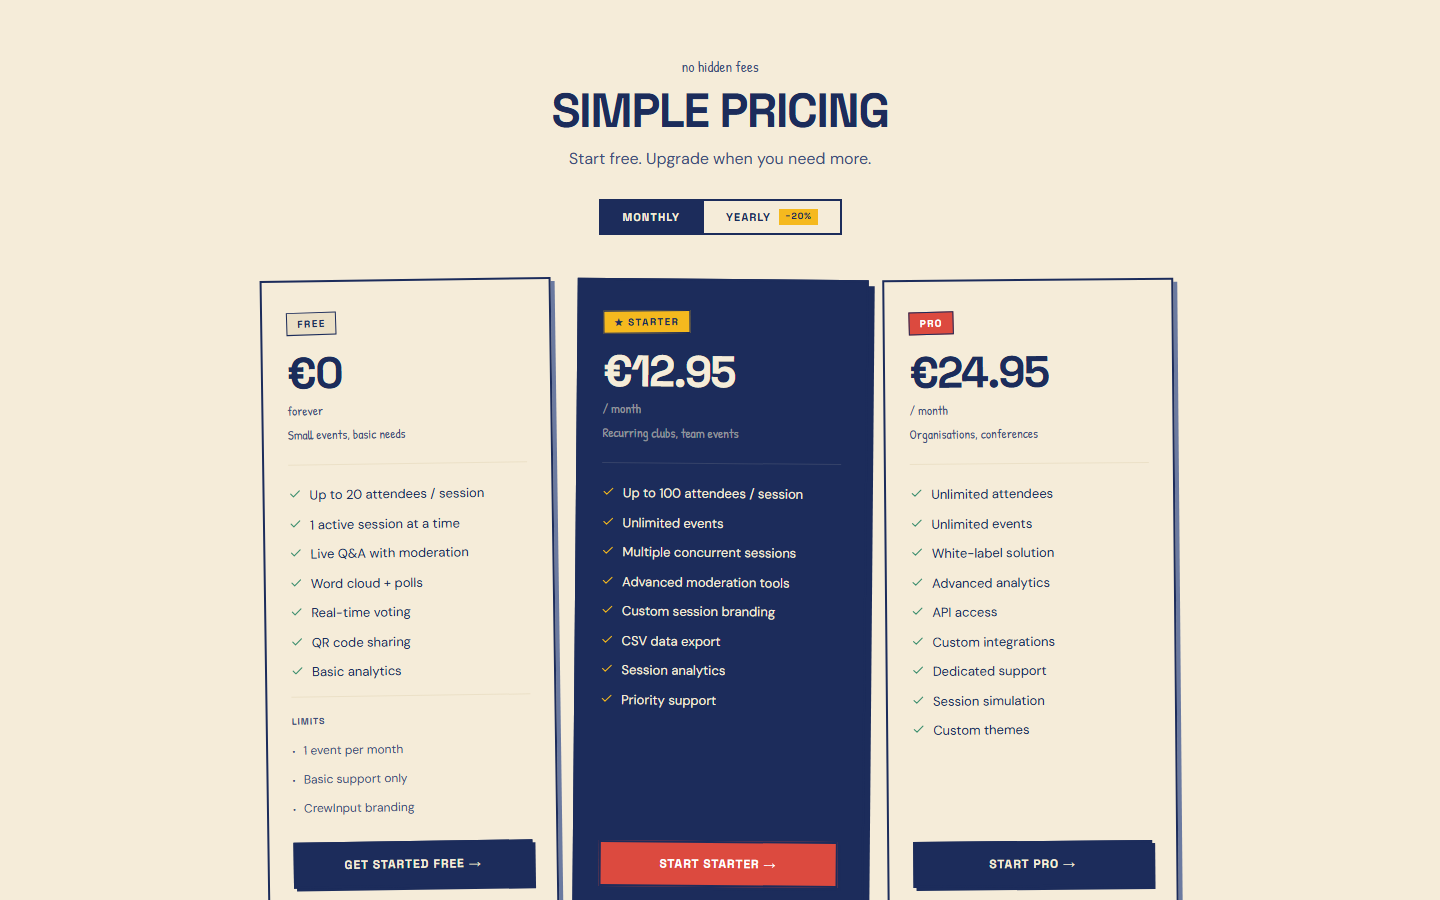
CrewInput offers three plans. All payments are handled by Stripe — your card details are never stored on CrewInput servers.
Free
€0
Up to 20 attendees, 1 active session, basic analytics.
Starter
€12.95/mo
Up to 100 attendees, unlimited sessions, charts, CSV export, branding.
Pro
€24.95/mo
Unlimited attendees, white-label, advanced analytics, API access, Simulation.
- 1Go to the Pricing page.
- 2Click the button on the plan you want.
- 3Complete payment via Stripe (card or other payment methods).
- 4Your plan is updated immediately — no waiting for a billing cycle.
- 5To cancel or change plans, go to Pricing and click "Cancel subscription" or the relevant upgrade button.
Need help with billing? Contact support.